Written by Michele Costa
Hey everyone! Michele from 144 Stitches and Stitch & Hustle blog here and today I am so excited to talk to you about 'How To Write A Pattern!' I have published over 170 patterns for both knitting and crochet and love designing. Bringing those ideas to life and seeing others create them is a feeling that is hard to describe. Pattern writing may seem daunting at first, but I assure you that with these steps you will be on your way. In truth, I could do a 10 part series or course on pattern writing as each facet has so much behind it. But for now, how about an overview to get you started andon your way to bringing your designs to life!
So let’s dive in.The first place to start is the basic understanding of what a pattern is and what it needs to do for people. I liken it to a roadmap. You want to give the user, reader, maker a map of directions and instructions to achieve a certain look and make what you have designed. It is really that simple.
Now, there are many ways to do this and many types of patterns, such as:
- Written patterns
- Video tutorials
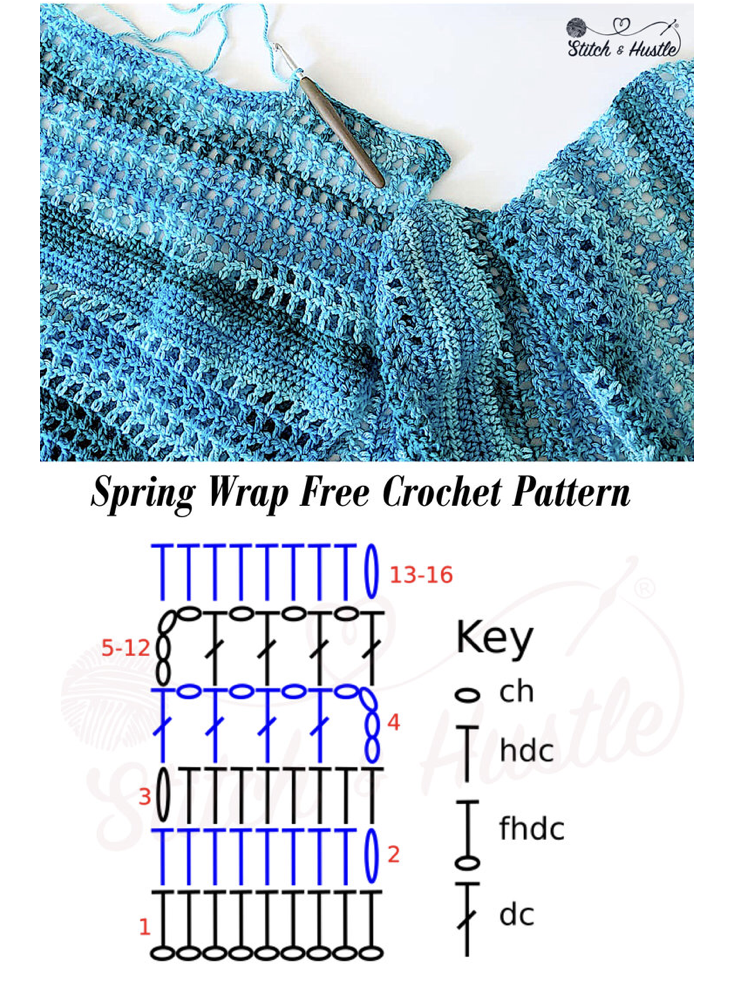
- Charts
- Graphs
- Schematics
- And some that have ALL of the above!
Whatever type of pattern you're working on, it all begins with your design - bringing that idea to life and in a way for others to do the same and create it. And know this...shocking truth exposed: THERE IS A LOT OF MATH IN DESIGN AND PATTERN WRITING. But don’t be intimidated. I will save that for another post and for now let’s get you on your way to writing that first awesome pattern!
For me there are two methodsof pattern writing that I use. The first is the "write it then make it method." I use this method about 50 percent of the time and it involves doing all of the swatching, sketching and math before I even pick up my needles or hook! So in effect, I have given myself a starting map to get the look I envision. The second method, and the one I want to talk about today, is the write it as you make it method and this is GREAT for beginner pattern writers. As you bring your idea to life, you are making the notes and charting the course for others to do the same.
Step 1: Write It All Down. ALL OF IT!
As you go through the process of creating your design, be sure to take notes. I don’t mean jot down what you think you did a few hours later kind of notes either. I mean after each row or round, you want to STOP! and make note of what you just did! Even if you change it later, write it down. If you do change it later, simply draw a line through and add what you changed it to. Rarely do I leave my house without a mini notebook and pencil in hand for design ideas and always have one in a project bag when working on a new pattern design.
Step 2: Transcribing: Clean Up On Aisle Notes!
Seriously! If I showed you some of my notebook pages, it look would like something between a mathematician masterpiece and a child scribble-fest with lots of words! THIS IS GOOD! This means I have made notes all along the way. Now let’s clean it up.
With your completed sample in hand you want to go over your notes and clean up what your pattern will be. Make sure that any changes you made are in fact noted and take those notes and type them up.
Step 3: Standards & Best Practices
Now that you have your outline it is time to get into the grit of making your pattern ready for public consumption. The first bit is to make sure that you are following industry best practices when it comes to terms and abbreviations. This is essential so that you can sell your pattern worldwide with ease and comfort and your customers can have confidence in the pattern. I check and follow the CYC Standards often for updates and it is the best place to get started. Check to be sure:
- Your abbreviations and terms are in line with best practices
- Your sizing is in line with standard industry sizing (and if not that is ok aslong as you NOTE IT!)
- Charts and symbols are in line with industry standards
Step 4: Tech Editing: Gotta Do it!
I could do a whole series on what Tech Editing is but let me just say this here: it is essential to have that second set of eyes from someone who is looking at your pattern from a strictly industry and technical standpoint. It is expensive. I get that. It is also necessary for me to send out a pattern to the world with confidence that it is in line with best practices as well as clear and concise for the users to achieve the design look. It is not the fluff. It is making sure your map gets people to their destination!
Step 5: Kick The Tires & Take That Baby Out For A Spin!
Ok it’s true...I like car metaphors for pattern writing because, again, it is a road map to get that final look achieved. Personally, I have a pool of over 100 testers for my patterns, people who reliably test my patterns and provide me with comprehensive feedback on the ease and flow of the pattern as well as the process of making my design. But I have been at this a while and you may not have such a pool. That is A-OK!
Grab a few of your fiber pals and ask them to take a stab at your new pattern. Ask them to follow it along to the letter, without assumptions or alterations. See how they do and ask for feedback. Here is the feedback to look for:
- Are the directions clear and concise?
- Did the abbreviations, symbols and charts all line up and match?
- Did they find the list of materials comprehensive and have the correct amount of yarn?
- Are they happy with the finished look of the item?
Based on that feedback, you can tweak and adjust your design if needed and then comes the best step of all...
Step 6: SET YOUR PATTERN OFF INTO THE WILD!
You did it!!! Celebrate with a high five and happy dance because you just wrote a pattern. Set that baby free and tell people all about it on social media and your sales channels.
The secret about a well written pattern is that you will hardly hear from anyone. They do not have questions! They make the thing and other than to show you their work and celebrate with you, it is a good sign if you don’t get a lot of questions or email.
I realize this is a cursory overview to get started. And like I said, I could easily do a full ten-part series on the how to of pattern writing....And maybe I will now that I think about it. But for now, this will get you on your way.
So take your ideas and make them into designs and make those into patterns! If you have any questions on getting started you can find me at www.stitchandhustle.com or on social media @stitchandhustle.
Happy designing!